In this tutorial we will go through on how to turn on or off a AC lamp, or any other AC electrical device with a Raspberry Pi, Cayenne and a relay module.
SINCE 120/230V AC IS DANGEROUS, DO NOT TOUCH WIRES FROM OUTLET WHILE IT IS POWERED ON! AND ALSO RECOMMEND YOU TO CHECK WITH ELECTRICIAN FOR WIRING. YOUR SAFETY IS MORE IMPORTANT.
Everyone wants to have use best home automation systems in their home , which is really expensive at times, Can I build my own home automation system to control your AC devices like lamp, Fan? . Yes we can, In this project we will work on simple way on how to control AC 230V lights. We can do this using Raspberry Pi and Arduino which are the two devices I have spoke in my previous IoT devices article. Controlling AC Light Using Arduino With Relay Module is one way, however we will be using Raspberry pi and Cayenne for building remote control wireless lights in your home.
Components Needed:
- Raspberry Pi
- 5V Relay Module
- AC Bulb
- Connecting wires
Power supply for Pi
- Smartphone or Tablet for Cayenne.
Refer the article to understand the basics of Relay module and connections.
Controlling AC Light Using Raspberry Pi With Relay Module and Cayenne:
For making automated lighting system for home and controlling AC Devices with Raspberry Pi, first connect the VCC of the Relay to GPIO Pin 2 and Relay GND to GPIO 39 which is GND in Pi. Connect the Raspberry Pi GPIO Pin 19 to Relay IN pin which will control the NO and NC connection of Relay . Connect the AC line 120/230V AC from Plug point to COM of Relay and other wire from NO or NC on relay to the bulb. The neutral from pug point will go directly to bulb.
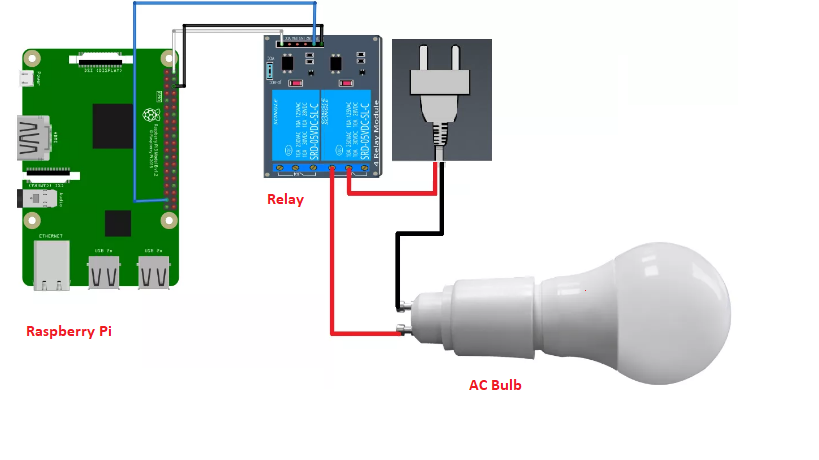
Connecting a light bulb with a Raspberry Pi

Make sure Cayenne is connected to your Raspberry Pi and create a LED or Toggle switch to control the Relay connection.
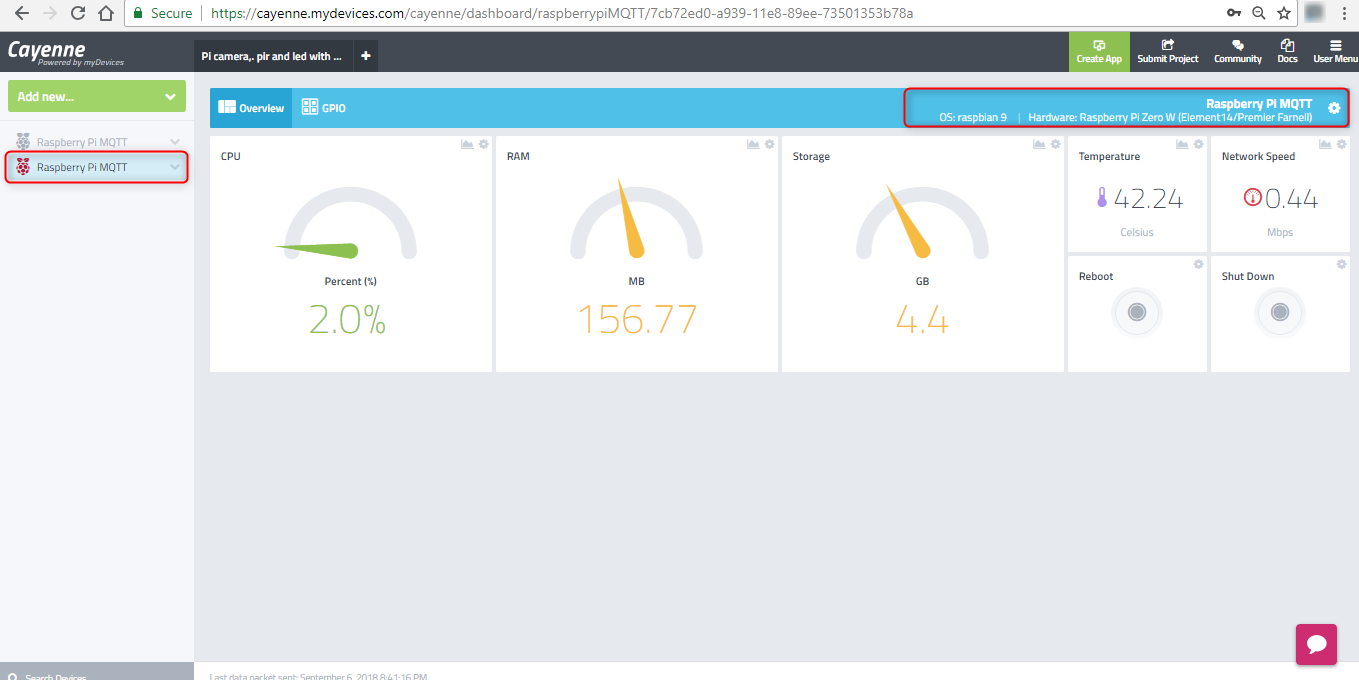
Once you login in cayenne , you will be able to see the dashboard page which gives the details of your raspberry pi. The dashboard gives you on the left the connected Raspberry Pi devices, if you have more than one devices connected it show all of them. If the device is online the color will be Red , if not it will be grey. Once you select your Raspberry Pi which is online, on the top right you will see the details of your device.
Now we have to add the device LED and it should be connected to the GPIO PIN 19. Kindly check the link for GPIO pin details.
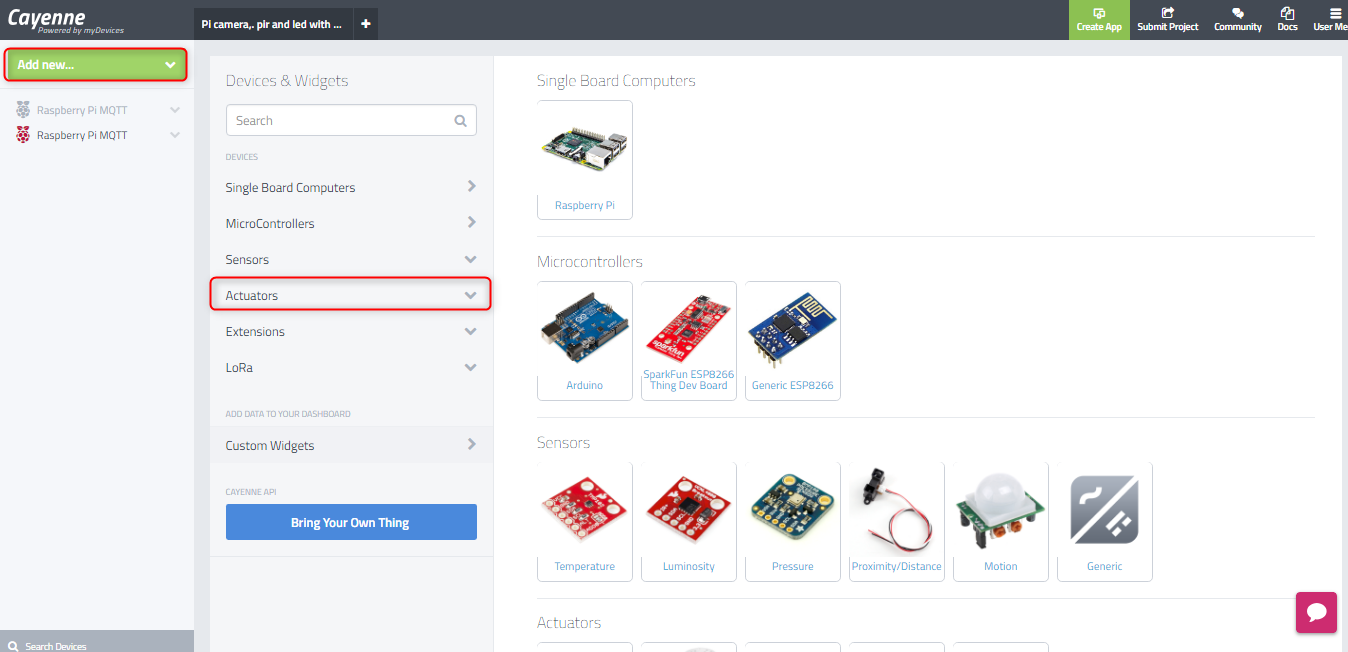
Click on Add New -> Device/Widgets which will take it to the screen to select the device.
Add Widgets
Select Actuators -> Click on Generic -> Digital Output.

Digital Output Widget
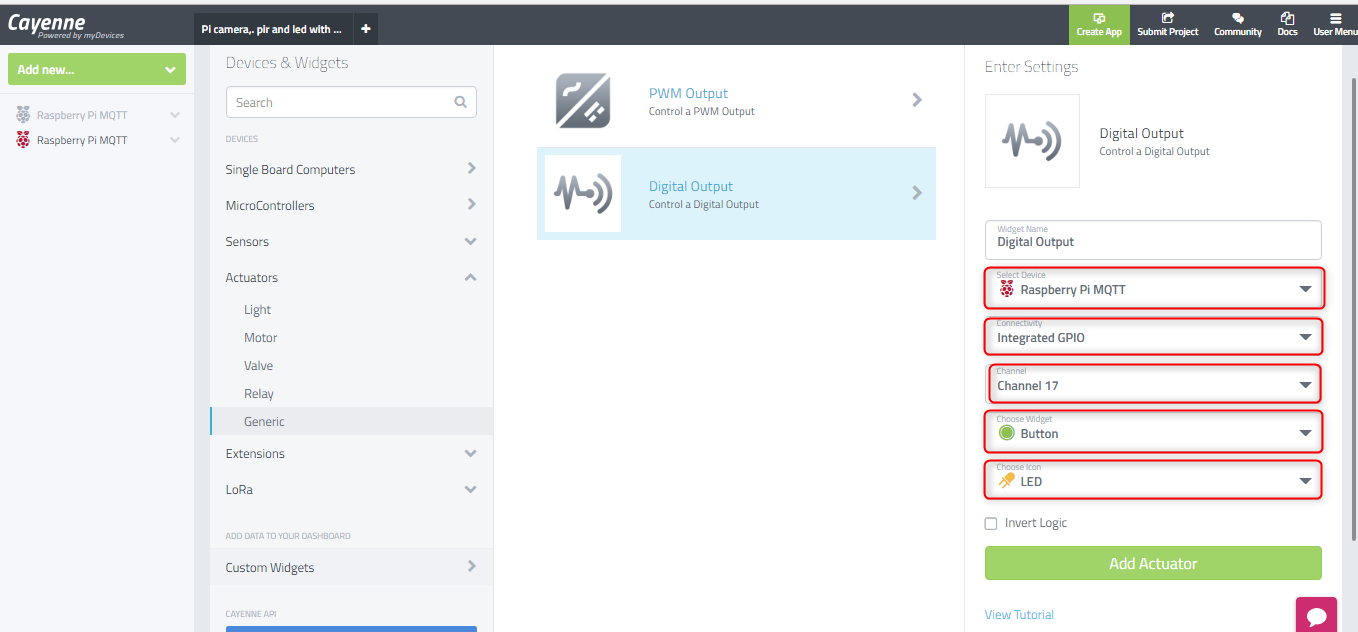
Once you click on Digital Output, we will get the options to configure the widget.
Select the Device --> Raspberry Pi
Connectivity -> Integrated GPIO
Channel -> Channel 17
Choose Widget -> Button
Choose Icon -> LED
And click on Add Actuator
The Widget is added to the home dashboard now & we are done. You can click on the Widget and the AC bulb i will Turn On and you can click again the bulb will Turn OFF. We can control any AC LED Lamp Controlled Through a Relay and Cayenne now through your mobile or smartphone.