Hello Friends, In my previous tutorial we have seen about Arduino simulation software TinkerCad and how to use the software for simulation of Arduino project. Today We will be creating Arduino LED Brightness Control circuit simulation and write the led brightness control arduino code which will be used for uploading to the physical Arduino board.
TinkerCad https://www.tinkercad.com is one of the best Arduino simulation software. Are you thinking of Arduino simulation software download ? we dont need to download anything as this is completely online and free. This will be an interesting LED Arduino Projects and we are going to AnalogWrite command in the program to do the Brightness control for LED. We will be using the Analog Pins in Arduino and not the Digital Pins.
We will see now what are the components needed for this led brightness control using arduino , you will be able to get the complete brightness control arduino code from this tutorial. Follow along.
What do you need:
- Arduino Uno Board
- USB Connector
- Bread Board
- LEDs
- Resistors -220 ohm
- Jumper wires – Male to Female and Male to Male
If you are not registered in TinkerCad , the first step is go to https://www.tinkercad.com arduino simulation software free and register yourself. It is a completely Free Arduino Simulation Software . Once you register go to section Circuits as you see on the below screen.
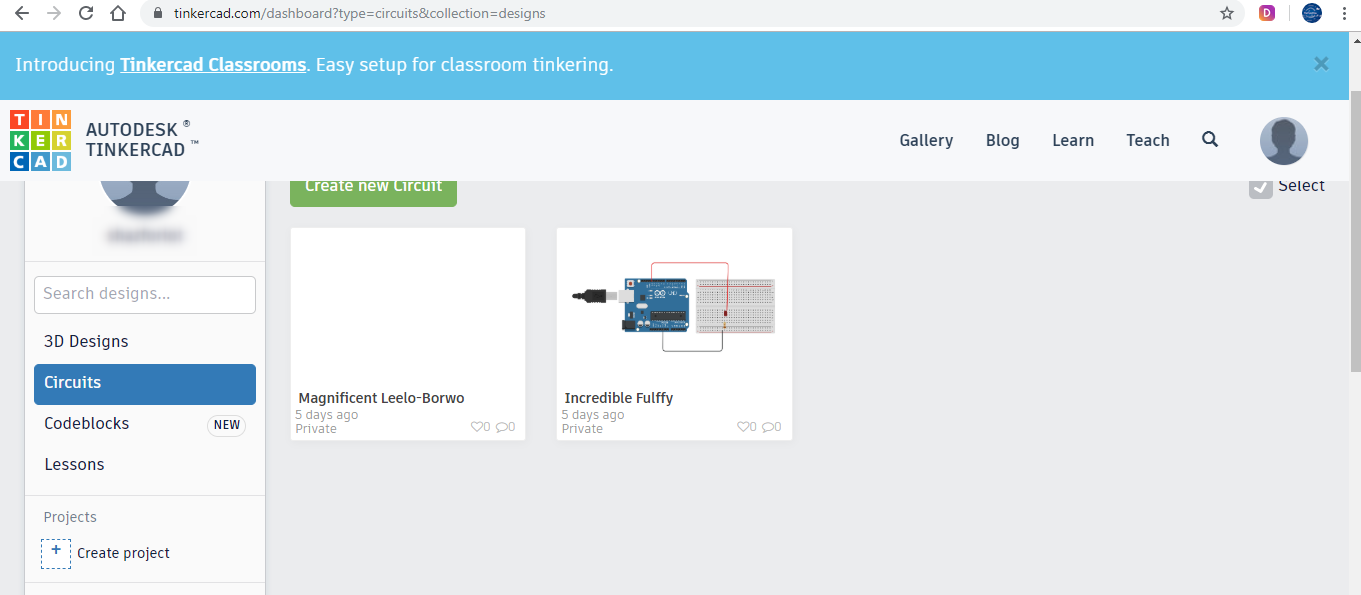
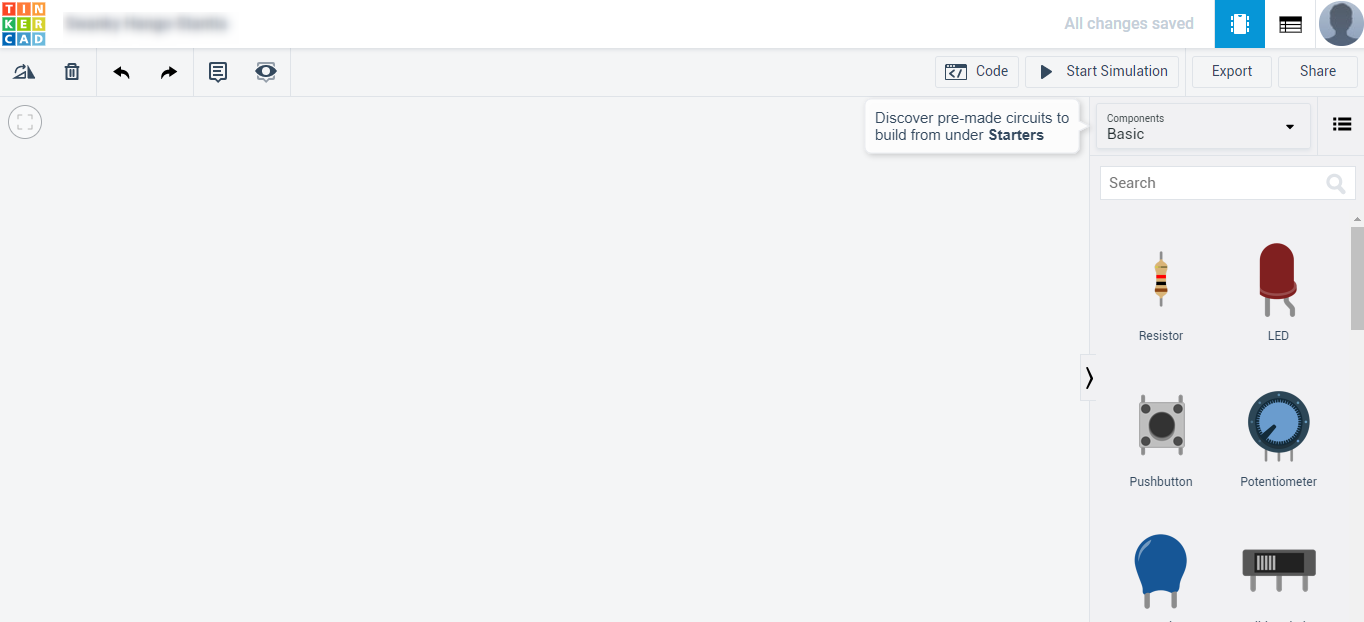
Click on create new circuits and you will get the blank page with the components on the right side.
You can check out the tutorial Arduino Free Simulation Software also to start with LED blinking project
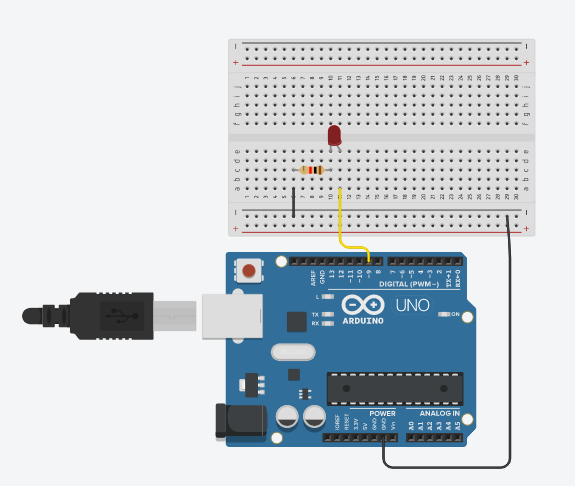
Lets add a Breadboard , Arduino UNO, LED and Resistor We will start with single LED and then will add more to make arduino fade multiple leds.
Use the connector wires to make the connections to the PIN 9 of Arduino to the LED. Check out the below circuit diagram. The pins which are marked with negative (-) signs are analog pins and rest are digital pins. So if you connect the LED to Digital Pins we can only have only High (1) or Low (0) values. We cannot do the fading or brightness control. For this Arduino projects using AnalogWrite the connect has to be in Analog Pins.
Once you make the connection to the Top right and select the Code button. In the first case it will show as blocks , click on text, Lets start writing the fading led arduino code.
Checkout the below for arduino led brightness control project Code. This is for one LED connection.
int brightness = 0;
void setup()
{
pinMode(9, OUTPUT);
}
void loop()
{
for (brightness = 0; brightness <= 255; brightness += 5) {
analogWrite(9, brightness);
delay(30); // Wait for 30 millisecond(s)
}
for (brightness = 255; brightness >= 0; brightness -= 5) {
analogWrite(9, brightness);
delay(30); // Wait for 30 millisecond(s)
}
}
In Tinkercad Arduino simulation app , once you write the code, click on Simulation button which will give you the output and the LED will be fading and coming back to the full brightness. Isn’t this is cool!.
Let me add more LED’s for this arduino rgb led projects and check out the below circuit diagram .
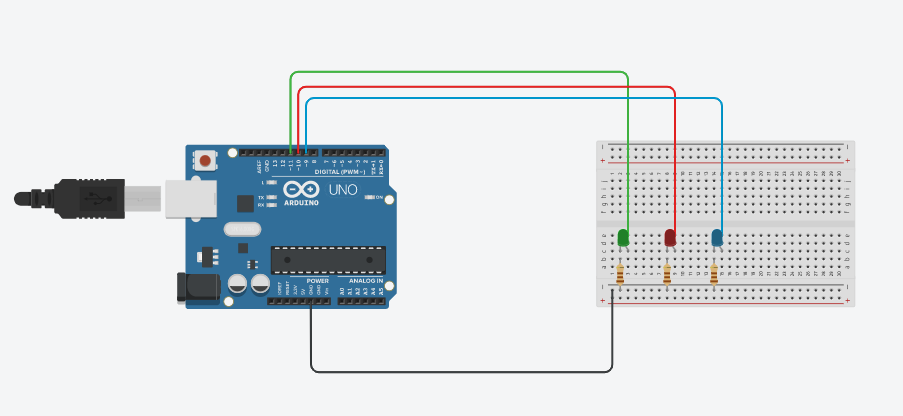
This is an interesting arduino projects home automation project and below is the arduino led projects code for multiple LED’s fading.
int brightness11 = 0;
int brightness10 = 0;
int brightness9 = 0;
void setup()
{
pinMode(11, OUTPUT);
pinMode(10, OUTPUT);
pinMode(9, OUTPUT);
}
void loop()
{
for ( brightness11 = 0; brightness11 <=255; brightness11 +=5)
{
analogWrite (11, brightness11);
delay (50);
}
for ( brightness10 = 255; brightness10 >=0; brightness10 -=5)
{
analogWrite (10, brightness10);
delay (50);
}
for ( brightness9 = 0; brightness9 <=255; brightness9 +=5)
{
analogWrite (9, brightness9);
delay (50);
}
}
I hope you like this arduino led fade tutorial and this is a arduino projects for kids or arduino projects for beginners. Check out my YouTube channel for more arduino uno projects.