Are you a blogger or web page developer ? You want to host a website and don't want to spend much money. Yes it is possible, setup a web server with raspberry pi. one of amazing uses for raspberry pi listed in my article is raspberry pi web server.This raspberry pi web server tutorial will describe the steps for how to make a Raspberry Pi Web Server.
Components Required:
Raspberry Pi ( Zero or model B+)
A Micro USB Power supply
Micro SD Card ( Recommended 8 GB)
TV or Computer Monitor ( it is possible to setup raspberry pi without monitor , for now we will connect the pi to monitor)
- HDMI cable
- Ethernet Cable ( If don't have wireless)
- Keyboard and Mouse
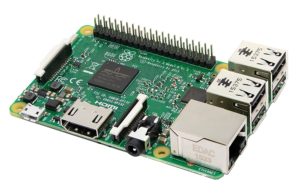
I would recommend Raspberry Pi 3 model B+, which is the latest Pi available in market & this is having good specifications as listed below for good raspberry pi web server performance.
- Quad Core 1.2GHz Broadcom BCM2837 64bit CPU
- 1GB RAM
- BCM43438 wireless LAN and Bluetooth Low Energy (BLE) on board
- 100 Base Ethernet
- 40-pin extended GPIO
- 4 USB 2 ports
- 4 Pole stereo output and composite video port
- Full size HDMI
- CSI camera port for connecting a Raspberry Pi camera
- DSI display port for connecting a Raspberry Pi touchscreen display
- Micro SD port for loading your operating system and storing data
- Upgraded switched Micro USB power source up to 2.5A
First need to install raspbian operating system on raspberry pi and have it ready to install the web server.
Follow the tutorial Setup Raspberry Pi 3 for the details. Now lets work on how to setup Webserver on Raspberry Pi.
Apache is a popular web server application you can install on the Raspberry Pi to allow it to serve web pages.
On its own, Apache can serve HTML files over HTTP, and with additional modules can serve dynamic web pages using scripting languages such as PHP.
How to install a web server on the Raspberry Pi :
Install apache on raspberry pi
First, update the available packages by typing the following command into the Terminal:
sudo apt-get updatesudo apt-get upgrade
Next install apache2 package with this command:
sudo apt-get install apache2 -y

Its pretty simple , isn't it ?
By default, Apache creates a test HTML file in the web folder /var/www/html/index.html. To test the web server enter http://localhost/ or the ip address of pi eg: http://192.168.1.xx in the web browser. You can run the ip address of pi eg: http://192.168.1.xx from another computer on the network.
The default web page either on the Pi or from another computer on the network when you browse to http://localhost/ or ip address of pi eg: http://192.168.1.xx will be as below.
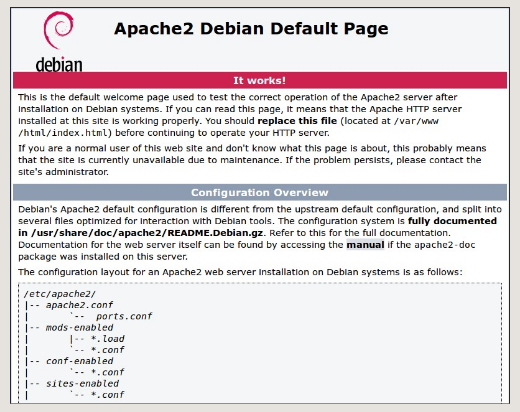
This means you have apache working! and your web server is ready.
Lets try to change the default web-page now we received to some content we would like to show in the web page.
The default web page HTML file is located at /var/www/html/.Navigate to this directory in a terminal window and have a look at what's inside.
cd /var/www/html

ls -al
This will show you:
total 12

drwxr-xr-x  2 root root 4096 Jan  8 01:29 .

drwxr-xr-x 12 root root 4096 Jan  8 01:28 ..

-rw-r--r--  1 root root  177 Jan  8 01:29 index.html
The default HTML file is called index.html and it is owned by the root user.In order to edit the file, you need to change its ownership to your own username using the below command.
sudo chown pi: index.html.
Pi is the default username. change it with your own if you have setup different user name.
You can edit this file using leafpad and make the changes in html page.
sudo leafpad index.html
If you make a change to the file, save it, and refresh the browser, you will see your change appear.
Additionally Install PHP :
PHP is a preprocessor: it’s code that runs when the server receives a request for a web page via a web browser. It works out what needs to be shown on the page, and then sends that page to the browser. Unlike static HTML, PHP can show different content under different circumstances. PHP is a very popular language on the web.
Install the PHP package with the following command
sudo apt-get install php libapache2-mod-php -y
Test php by removing index.html located at /var/www/html/and creating a php file.
sudo rm index.html
sudo leafpad index.php
Add some php content on the index.php file and save it.
<?php echo "hello world"; ?>
Now save and refresh your browser. You should see "hello world".
Reference links https://projects.raspberrypi.org/en/projects/lamp-web-server-with-wordpress/ and https://www.raspberrypi.org/documentation/remote-access/web-server/apache.md