We have done multiple home projects like Lighting LED with Raspberry Pi & Python script , Lighting LED with Raspberry Pi & Cayenne , AC Light control with Raspberry Pi & Cayenne , Surveillance Camera & email notification on motion detection.

In order to do home Surveillance Camera with live feed using Open CV, we setup opencv on raspberry pi. There are several ways to install opencv in raspberry pi, however the easiest way to install opencv on raspberry pi will be pip install opencv raspberry pi.
Can we install opencv on raspberry pi zero w, yes we can do that however considering the memory and performance we will be using Raspberry pi 3 B+. Running opencv raspberry pi zero is not a good idea. The installation will take long time and overall performance is bad compared to raspberry pi 3 opencv performance.
This opencv raspberry pi tutorial we will cover the initial setup of raspberry , the pre-requisite package installs , setup opencv virtualenv raspberry pi.
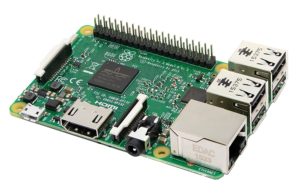
We are using Raspberry Pi 3 model B+, which is the latest Pi available in market & this is having good specifications as listed below
- Quad Core 1.2GHz Broadcom BCM2837 64bit CPU
- 1GB RAM
- BCM43438 wireless LAN and Bluetooth Low Energy (BLE) on board
- 100 Base Ethernet
- 40-pin extended GPIO
- 4 USB 2 ports
- 4 Pole stereo output and composite video port
- Full size HDMI
- CSI camera port for connecting a Raspberry Pi camera
- DSI display port for connecting a Raspberry Pi touchscreen display
- Micro SD port for loading your operating system and storing data
- Upgraded switched Micro USB power source up to 2.5A
Components needed:
- A Micro USB Power supply
- Micro SD Card ( Recommended 8 GB or above)
- TV or Computer Monitor
- HDMI cable
- Ethernet Cable ( If don't have wireless)
Follow the step by step instruction in the article http://www.thetips4you.com/setup-raspberry-pi-3-for-your-iot-projects/ to prepare the Raspberry pi if you don't have the OS already installed.
How to install OpenCV on Raspberry Pi 3 NOOBS:
Raspberry Pi opencv install script is using PIP so first we need to enable PIP in RPI.
For installing pip for python 3 use the beow commands:
sudo apt update
sudo apt install python3-pip or sudo apt install python -pip
Check the pip version using pip --version
Before installing opencv on raspberry pi , lets prepare the Pi with pre-requisites.
sudo apt-get install libhdf5-dev libhdf5-serial-dev
sudo apt-get install libqtwebkit4 libqt4-test
How to easily install opencv on raspberry pi ? , The easiest way is with out virtual environment . The draw back is that you cannot run different version of Open CV in isolated environment.Most of use the open cv on one raspberry pi for main uses raspberry pi image processing, live video and other face recognition using raspberry pi 3 projects.
Install OpenCV in Raspberry Pi 3 b+
The below simple command will install opencv with out virtual environment.
sudo pip install opencv-contrib-python
It may take few mins , some time near to one hour to complete the installation. Raspberry pi image processing opencv is ready.
To install opencv on raspberry pi with virtual environment refer the article https://www.pyimagesearch.com/2018/09/26/install-opencv-4-on-your-raspberry-pi/
If your SD card have low space when installing opencv in raspberry pi, you can remove some of the unwanted software and files for PI , use the below steps for it.
sudo apt-get -y purge wolfram-engine
sudo apt-get -y purge libreoffice*
sudo apt-get -y clean
sudo apt-get -y autoremove
With this tutorial you know opencv download and how to run opencv on raspberry pi 3. Make the pi ready for next project with Open CV.